SGB Custom Painting Blog
The Essential Guide to Paint Prep: Why 80% of a Great Paint Job Happens Before You Open the Can
Peterson SEO • December 15, 2025 | Chico, CA | USA
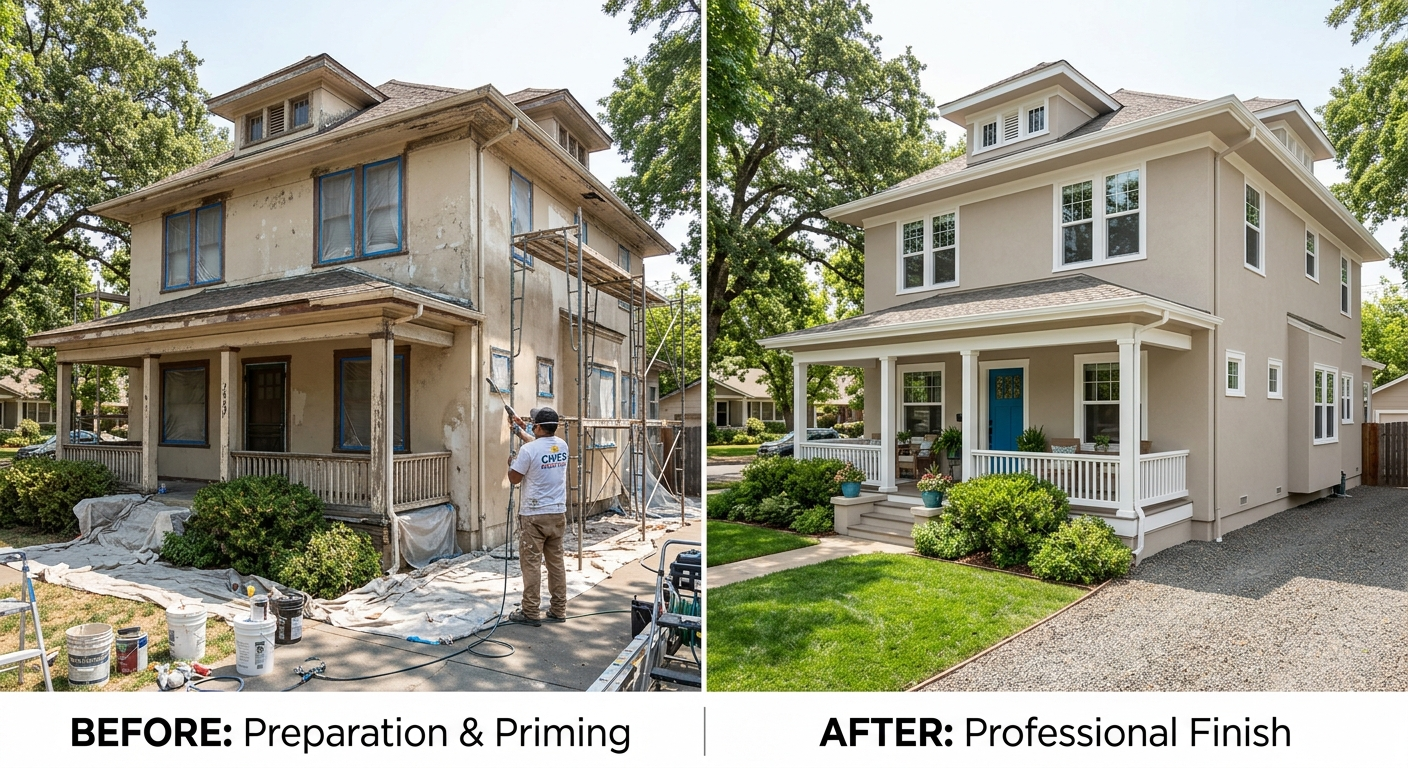
The Part No One Wants to Talk About
We all love the "reveal" moment in a home improvement project because it feels like magic. There is something incredibly satisfying about rolling a fresh, vibrant color onto a wall and watching a room transform instantly right before your eyes. It is the part of the project that feels like actual progress and gives you that instant gratification we all crave. It is the part they show in the montages on TV renovation shows because it looks fast, easy, and dramatic. But here is the hard truth that every professional painter Chico homeowners trust knows from years of experience in the field. The actual painting is just the victory lap at the end of a very long, very dusty marathon. The real race is won or lost long before the lid comes off the paint can.
If you have ever painted a room only to see the color peel a year later, you know this pain personally. Or perhaps you have painted over a nail hole hoping the paint would fill it, only to realize that paint shrinks and leaves a visible divot. In our area, where homes face the unique "Chico cycle" of baking summers and wet winters, preparation isn't just about making things look smooth for a few days. It is about engineering a surface that can hold onto a coating while expanding, contracting, and fighting off intense UV rays. Without this engineering, the paint is just a temporary cosmetic film that will fail.
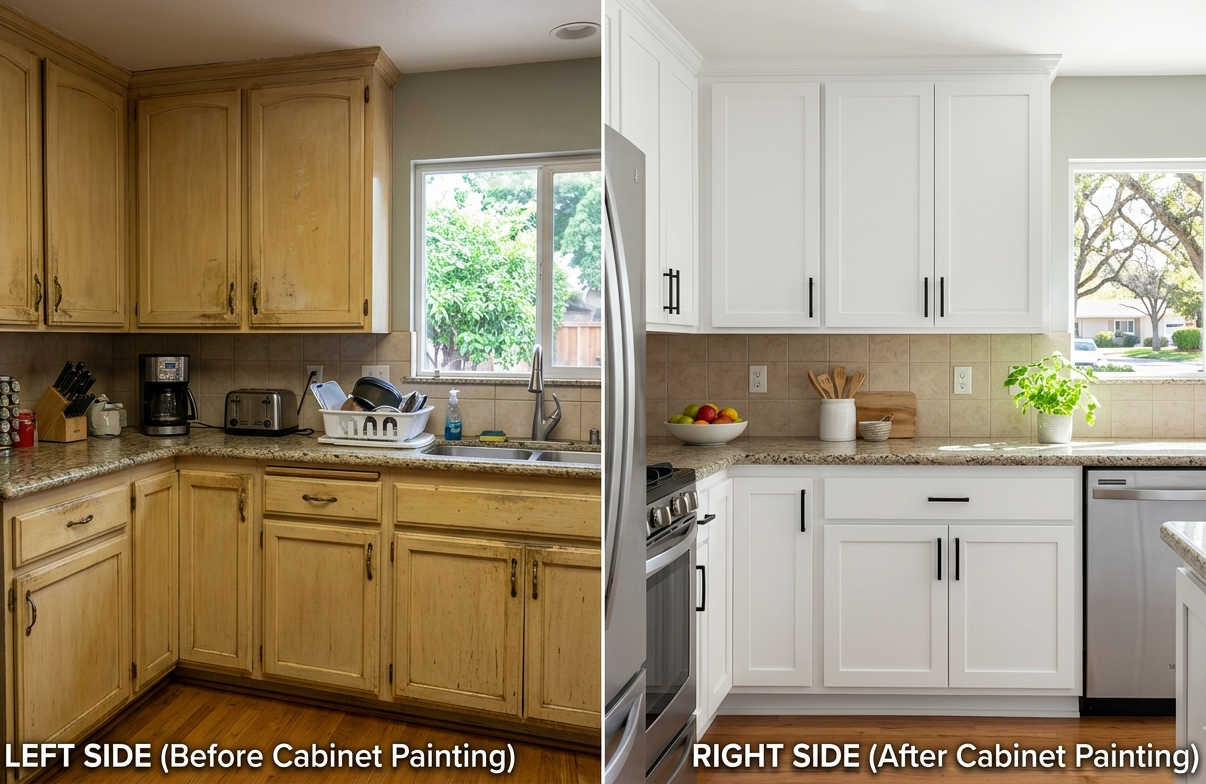
Many homeowners assume that buying premium paint will hide poor preparation or fill in the cracks magically. The reality is actually the opposite because high-quality paints shrink tighter as they dry to form a durable shell. High-quality paint often highlights imperfections because it dries to a tighter, smoother finish that reflects light across every bump and scratch. If you apply a premium gallon of paint over a dirty, dusty wall, you have just created expensive wallpaper that will peel off in sheets within months. In this comprehensive guide, we are going to walk you through the gritty, dusty, unglamorous work of professional prep. We will cover the specific steps for both interior painting Chico projects and exterior painting Chico overhauls, giving you the roadmap to a finish that actually lasts.
Quick Answer: What Is "Proper" Paint Prep?
Professional paint preparation can be summarized by the industry standard: Clean, Dry, Dull, and Sound.
- Clean: The surface must be free of dust, grease, chalk, and mildew. If it isn't, the paint will bond to the dirt instead of the wall and eventually fall off.
- Dry: Moisture trapped under paint causes blistering and peeling. Wood moisture content should ideally be under 15% before painting to ensure a lasting bond.
- Dull: Glossy surfaces must be sanded or de-glossed to remove the shine. New paint cannot grab onto a shiny, slick surface; it needs "tooth" or micro-scratches to form a mechanical bond.
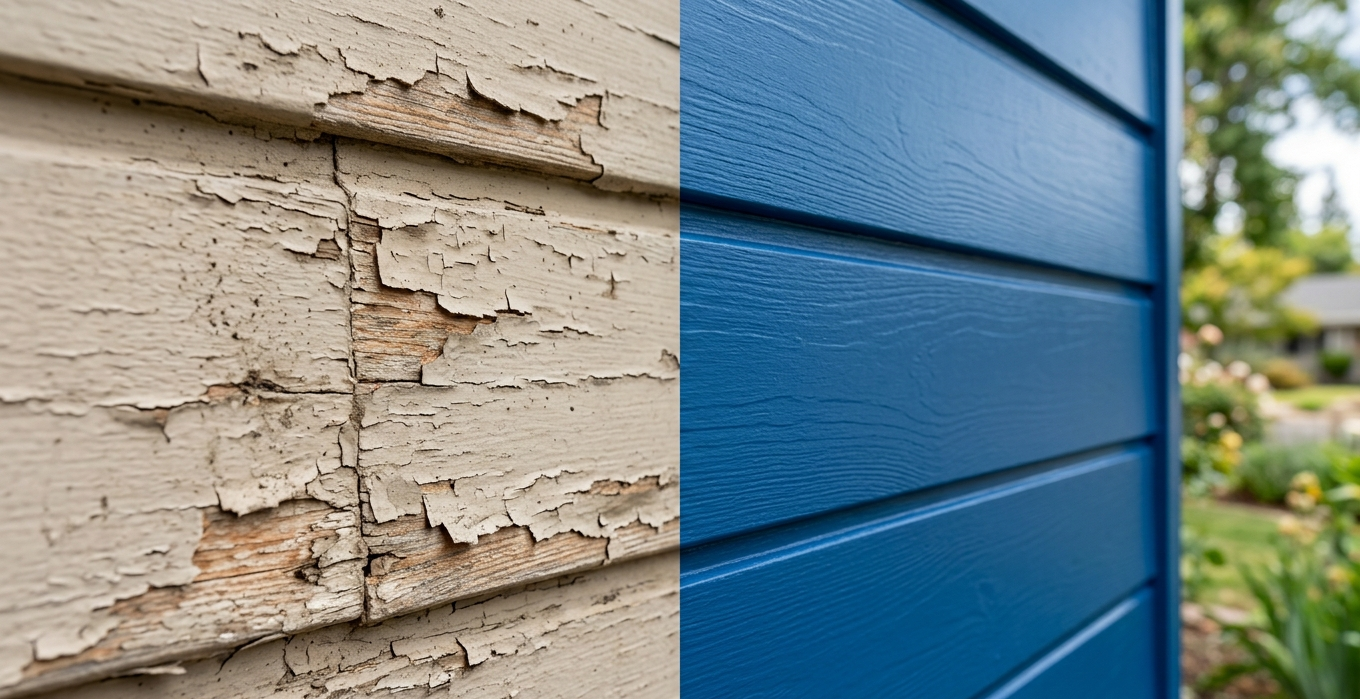
- Sound: All loose, peeling, or checking paint must be removed until you reach a solid edge. If you can lift the edge of the old paint with a fingernail, it has to come off.
The Golden Rule: You should expect to spend roughly three to four times longer prepping your home than actually painting it. Industry colleagues at Southern Painting reinforce this in their step-by-step guide to surface preparation, noting that specific steps like washing and sanding are non-negotiable for a professional result. If you are applying color on day one of your project, you almost certainly skipped a critical step that will cost you later.
The Science of Adhesion: Why Paint Fails
To understand why prep is so vital, you have to understand how paint actually sticks to your house on a molecular level. Paint adheres to your home in two very specific ways, which are chemical bonding and mechanical bonding. Both mechanisms need to work together for the paint to survive the harsh Chico climate.
Chemical bonding happens when the resin in the wet paint interacts with the surface or the primer. This is why we stressed the importance of compatible chemistries in our previous guide on interior vs. exterior paint differences. If you put a water-based paint over an old oil-based glossy trim without a bonding primer, the chemistry fails completely. The wet paint simply sits on top like water on a waxed car hood, never actually gripping the substrate. It might look fine when it dries, but a slight scratch will peel it right off.
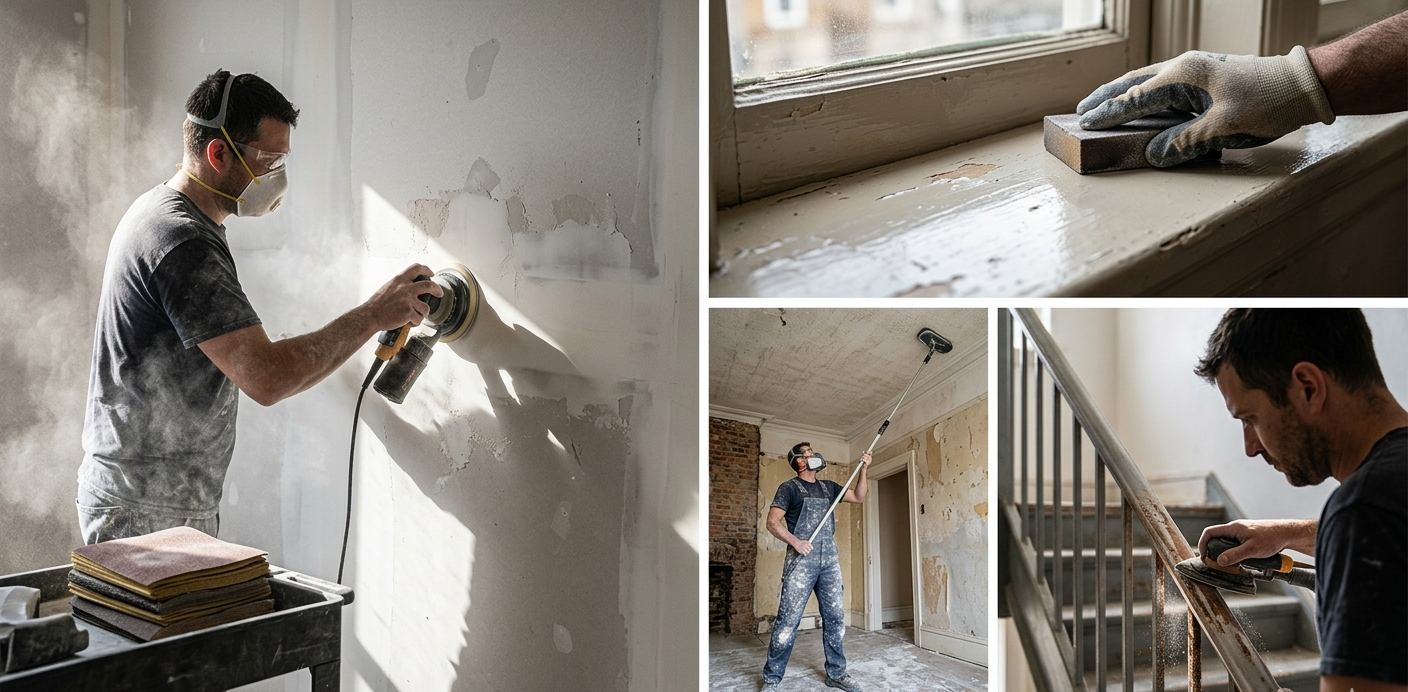
Mechanical bonding is like Velcro for your walls, creating a physical grip. The paint flows into the microscopic pores, scratches, and texture of the surface. When it dries and cures, it locks into these tiny valleys to hold on tight. This is why sanding is non-negotiable for almost every surface, inside and out. When you sand a wall or a piece of trim, you are scratching millions of tiny grooves into the surface. These grooves maximize the surface area for the paint to grip. If you skip sanding, you reduce your adhesion strength by half, making the paint vulnerable to peeling.
In Chico, we also deal with significant environmental contaminants that interfere with adhesion. Agricultural dust from the orchards, pollen in the spring, and general road grime settle on our homes constantly. If you paint over that layer of microscopic dust, the paint bonds to the dust particles, not the siding. When the wind blows or the house moves, the dust layer separates from the house, and your paint peels off with it.
Exterior Prep: Protecting Your Structural Skin
Exterior prep is heavy-duty work that requires more than just a scraper and a ladder. You are fighting against nature and undoing years of weather damage to create a fresh start. If you identified issues in our article on 7 warning signs your home needs painting, this is the phase where you actually fix them. We also explained in our guide on how often to repaint your exterior that the durability of your finish is determined right here. Skimping on these steps ensures you will be painting again in three years instead of ten.
Step 1: The Deep Clean (Pressure Washing)
Every exterior painting Chico project starts with water, but not just a quick rinse with a garden hose. You need to remove the "chalking" dead resin dust, mildew, and embedded dirt that accumulates over time. This requires a systematic approach to cleaning every square inch of the siding and trim.
- The Technique: This isn't just spraying water at high velocity, which can damage the house. It often requires a specialized house-wash detergent that kills mildew spores at the root. If you just spray water on mold, it will survive and grow right back through the new paint within months.
- The Caution: High pressure can destroy wood siding and inject water behind stucco or siding laps. We use lower pressure with higher volume, effectively scrubbing the house with water rather than blasting it.
- Drying Time: This is critical and often rushed by amateurs who want to start painting. After washing, the house must dry completely before any paint touches it. In a Chico summer, that might take 24 hours due to the heat. In spring or fall, it might take 2 to 3 days for the wood to release that moisture. Painting over damp wood is the fastest way to get blisters.
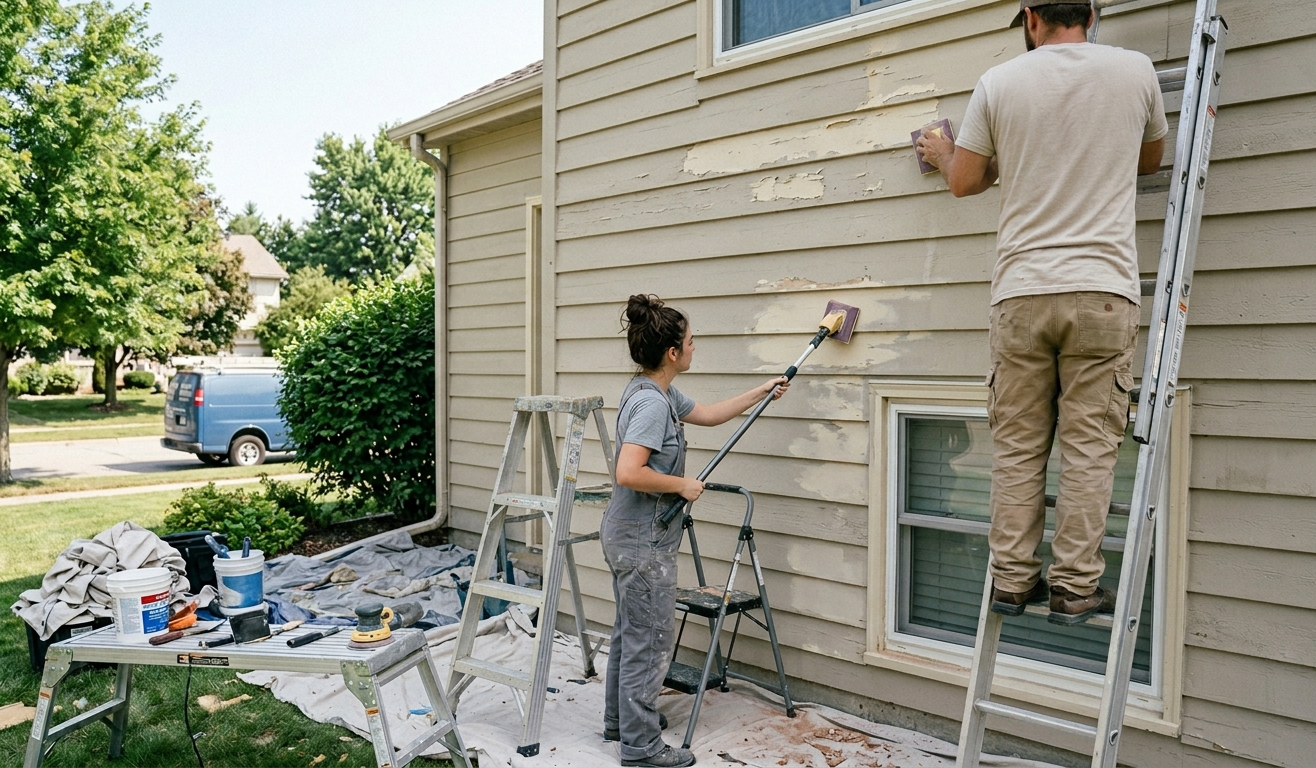
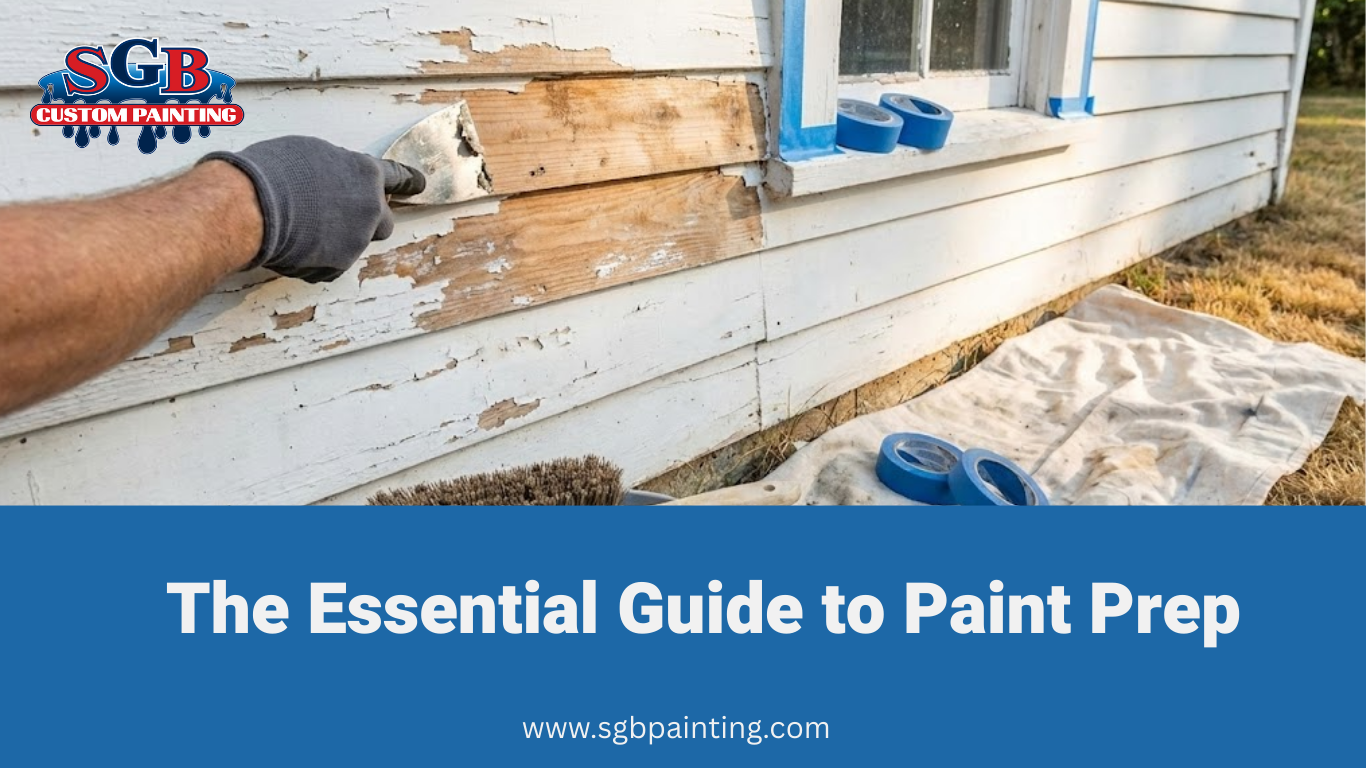
Step 2: Aggressive Scraping
Once the house is bone dry, the hard manual labor begins. Any paint that is peeling, flaking, or bubbling must go immediately to reach a sound surface. You cannot paint over loose material and expect it to hold for more than a few weeks.
- The Standard: You scrape until the paint refuses to come off any further. If you can slip a putty knife under the edge of a paint chip, it has to come off. We often use carbide scrapers that are incredibly sharp to get down to a sound surface.
- Lead Safety: If your home was built before 1978, this step requires strict EPA Lead-Safe practices. We contain all chips on plastic sheeting, wear respirators, and use HEPA vacuums to capture toxic dust. Never dry scrape lead paint into the wind, as it endangers your family and neighbors.
Step 3: Feather Sanding
Scraping leaves behind a sharp, jagged edge where the old paint meets the bare wood. If you paint over this "crater," it looks terrible and creates a weak point in the finish. Water can sit on that ridge and work its way back under the paint, causing it to lift again.
- The Process: We use power sanders to grind down that sharp edge until it feels smooth to the touch. This "feathering" creates a gentle ramp from the bare wood up to the old paint. It makes the transition invisible once the topcoat is applied, giving you a smooth finish.
- Surface Profile: This step also scuffs up the remaining old paint around the repair. This ensures the new coat sticks to the glossy old paint as well as the bare wood.
Step 4: Repairs and Replacement
This is the stage where we fix the structural damage found during the scraping process. You never want to put good paint over bad wood because the rot will just spread.
- Wood Rot: Soft wood is dug out completely until we hit solid fiber. If the damage is minor, we use a two-part epoxy wood hardener and filler that restores structural strength. If the damage is deep or covers a large area, we replace the board entirely.
- Stucco Cracks: Hairline cracks are brushed clean to remove loose debris and dust. They are then filled with a textured elastomeric patch that stretches with the house to prevent the crack from reappearing.
Step 5: Priming (The Anchor)
You cannot put finish paint directly on bare wood or masonry repairs. It will soak in too fast and fail to form a protective film on the surface. This step acts as the bridge between the substrate and the finish.
- Spot Priming: Every spot we scraped or sanded down to bare material gets a coat of high-quality exterior primer. This seals the wood fibers and provides a uniform surface for the topcoat to grab.
- Full Priming: On older homes with extensive weathering or T1-11 siding that has lost its face, we often prime the entire house. It acts like a "reset button" for the surface, ensuring perfectly even absorption of the finish coat.
Step 6: Caulking (The Waterproof Seal)
This is the final step before painting begins and is crucial for waterproofing. We inspect every joint where wood meets wood, or wood meets siding. This is your primary defense against water intrusion into the walls.
- The Gap: We cut out old, failing caulk that is cracked or loose. Leaving bad caulk in place and applying new caulk over it rarely works for long because the old caulk continues to crumble.
- The Seal: We apply a fresh bead of siliconized acrylic latex caulk to the gaps. This prevents water from getting behind your trim and rotting the house from the inside out. Note that we never caulk the bottom edge of lap siding, as that gap needs to remain open so the house can breathe and release moisture.
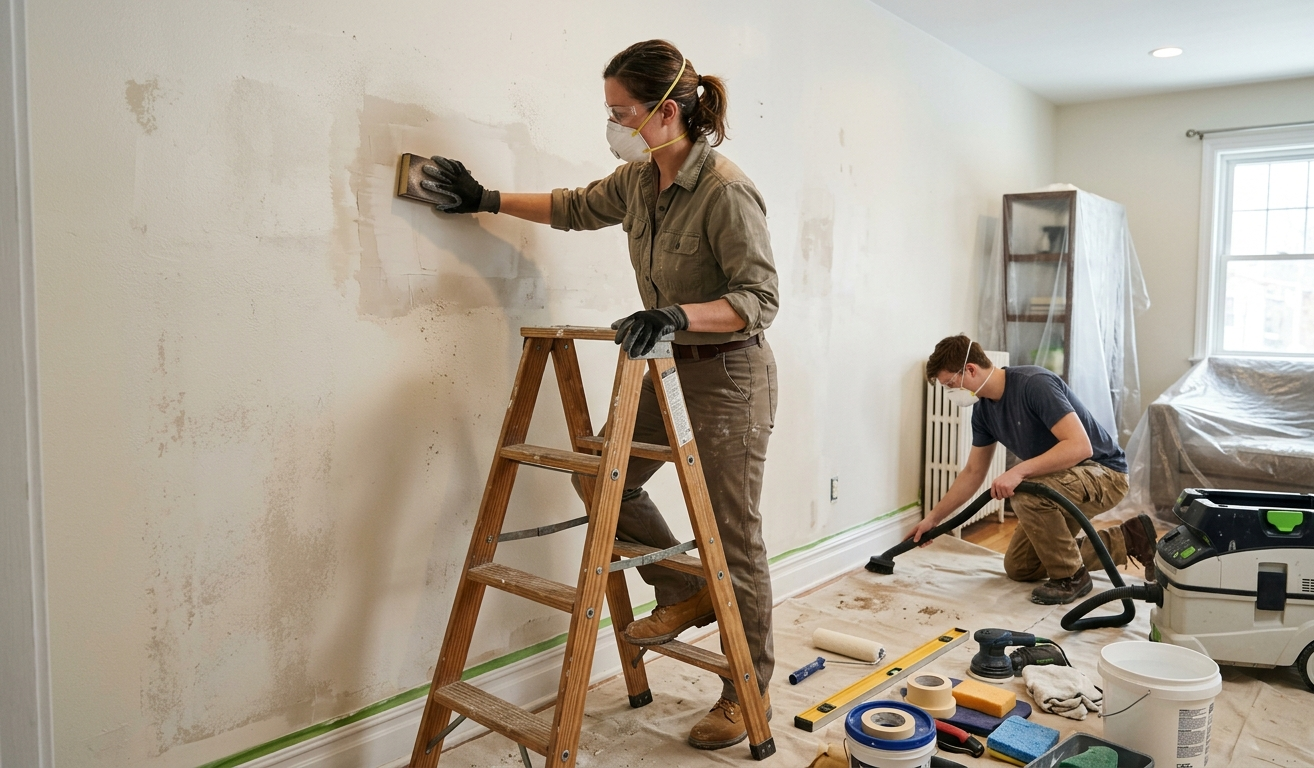
Interior Prep: The Pursuit of Perfection
Interior painting Chico prep is less about weatherproofing and more about aesthetic perfection and cleanliness. Your walls are viewed from two feet away, not from the street. Every bump, hole, and scratch shows up under interior lighting, so the standards for smoothness are much higher.
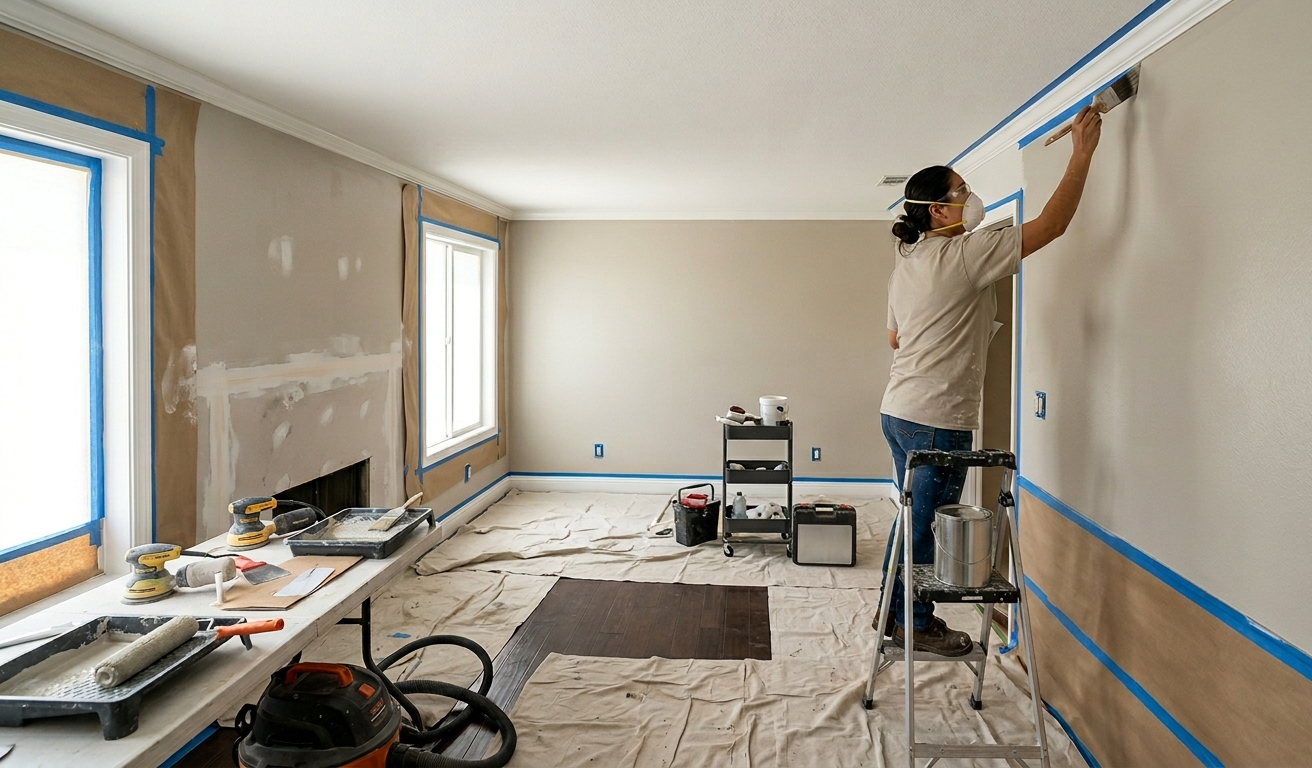
Step 1: Protection and Clearing
We don't start by touching the walls at all when we enter your home. We start by protecting your life and your belongings to ensure no damage occurs. We treat your home with the utmost respect.
- Furniture: Heavy items are moved to the center of the room and covered with fresh plastic sheeting. This creates a clear workspace around the perimeter of the room for ladders and tools.
- Floors: Hardwood and tile are covered with heavy rosin paper or cardboard to protect against spills and impact. Carpet is shielded with thick canvas drop cloths that absorb paint drips. We tape down the edges to ensure no dust gets underneath the covering.
Step 2: Cleaning and Degreasing
Most homeowners skip this step, but it is vital, especially in kitchens and bathrooms. Walls collect oils from cooking, hair spray, and hands over time that repel paint.
- The Kitchen: We use a degreaser or a TSP substitute to wash down kitchen walls thoroughly. Paint cannot stick to grease, and if you skip this, the paint will separate or peel near the stove.
- The Bathroom: We wash walls to remove soap scum and hairspray residue. These contaminants act like a release agent, preventing the new paint from bonding to the drywall.
Step 3: Patching and Repairs
Nail holes, dings from moving furniture, and settling cracks need to vanish completely. We don't just dab spackle on them and paint over it immediately.
- Overfilling: We fill holes with a non-shrinking spackle or joint compound. We slightly overfill the hole because the compound shrinks as it dries, which would leave a dimple.
- Sanding Flat: Once dry, we sand the patch completely flat to the wall. If you can feel the patch with your eyes closed, you will see it when it is painted. The goal is to make the wall feel like one continuous, unbroken surface.
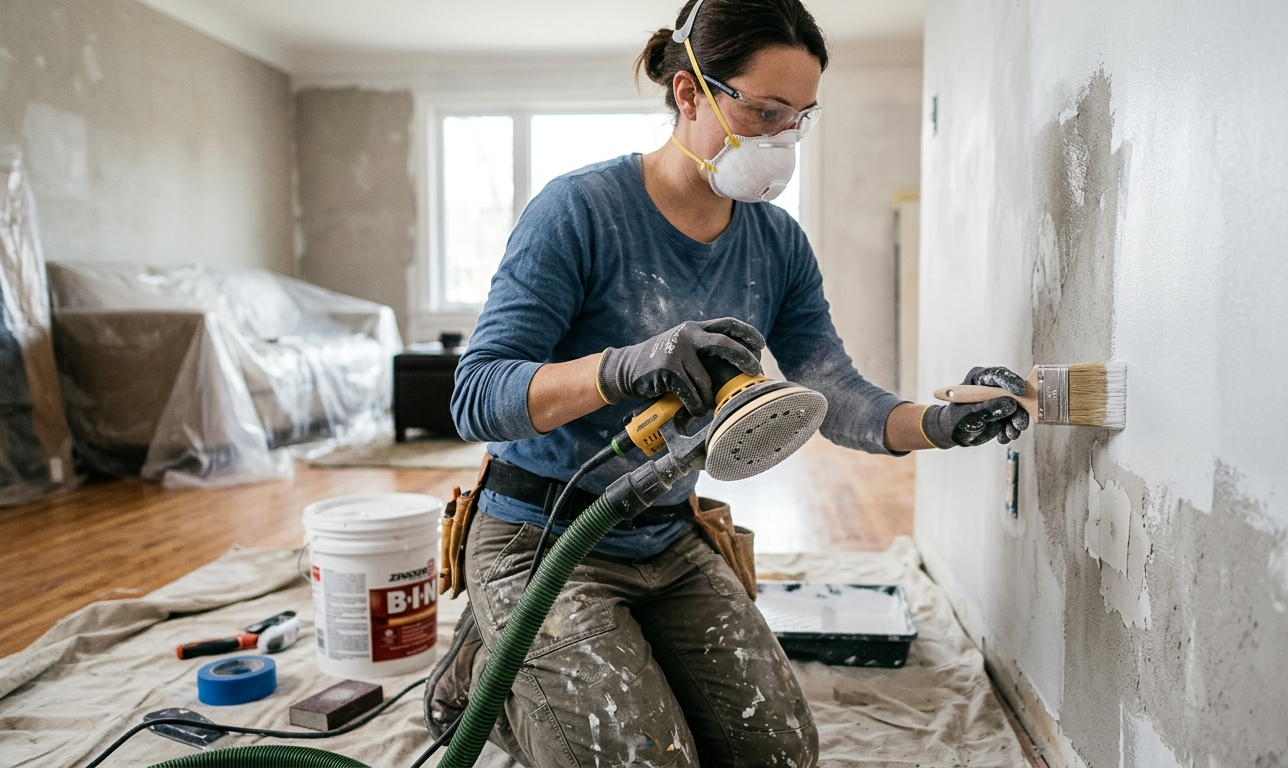
Step 4: Full Wall Sanding (Pole Sanding)
This is the secret weapon of professional residential painting chico crews. We sand all the walls, not just the patches we made.
- Why We Do It: We use a pole sander with fine-grit paper to run over every square inch of the drywall. This knocks down "nibs" (lint from the old roller), dust, and stuck-on grime.
- The Result: It opens up the pores of the old paint, ensuring a mechanical bond for the new coat. It leaves the walls feeling smooth as glass before we even open the paint can.
Step 5: Caulking Baseboards and Trim
Look at your baseboards where they meet the wall in your home right now. Is there a dark hairline crack running along the top edge? We run a thin bead of paintable caulk along the top of the baseboards and door casings to fill that gap.
This small step makes a massive visual difference in the final product. It makes the trim look integrated and crisp against the wall color. It creates that seamless, high-end look that distinguishes a pro job from a DIY weekend project.
The "Chico Factor": Why Local Prep is Different
In Butte County, we have specific challenges that change how we prep compared to other regions. Our soil is rich in clay, which creates a very fine, reddish dust in the summer. This dust settles on everything, including vertical exterior surfaces.
Before we paint, we have to be meticulous about removing this dust layer. If we pressure wash on Monday and don't paint until Friday, we often have to wipe down the siding again because the dust has returned. Painting over dust is the number one cause of peeling in our valley.
Also, our extreme summer heat affects how patching compounds dry. In July, spackle can dry too fast and crack before it cures. We have to use specific compounds or work in the cooler morning hours to ensure the repairs cure properly without shrinking or cracking.
When to Call a Professional
There is nothing wrong with painting a bedroom yourself if you have the time and patience. However, extensive prep work is physically demanding and requires specific tools to do correctly. If your home needs extensive scraping, ladder work on a second story, or repair of dry rot, it is often safer and more effective to hire a pro.
Professionals have the scaffolding, the dust extraction sanders, and the safety gear to do the job right. We also have access to industrial-grade primers and fillers that aren't always available at the local hardware store. When you hire a painter Chico locals recommend, you are paying for their knowledge of substrate repair as much as their ability to brush and roll.
How SGB Custom Painting Can Help
At SGB Custom Painting, we pride ourselves on being "Prep-Obsessed." We know that the longevity of our work depends entirely on what is underneath the finish coat. We don't cut corners on cleaning, and we don't paint over problems just to get the job done faster.
When you hire us, you will see us spend days preparing your home before you see a drop of color. That is intentional and necessary for a quality result. We are building a foundation for a paint job that will look beautiful and last for years against the Chico sun and rain.
If you are ready for a paint job that is done right from the first scrape to the final coat, let's talk about your project. We can walk you through our prep process for your specific home and show you exactly how we plan to protect your investment. Reach out to SGB Custom Painting today to schedule your estimate.
About SGB Custom Painting
SGB Custom Painting is a trusted Chico Painting Contractor known for clean prep, clear communication, and color that holds. For more than twenty five years, our local team has delivered interior, exterior, and cabinet projects for homes and businesses with careful protection, proper priming, and tidy jobsites. We follow EPA lead safe practices on older properties, keep schedules dependable, and give every project the respectful touch the North Valley deserves.
Love Your Space Again, Starting Today!
Locally Owned & Operated • EPA Lead Safe Certified • CSLB Licensed
Call 530-924-4109 or complete the form and expect a friendly call to confirm scope, discuss color options if needed, and deliver a no surprise estimate you can approve with confidence.
Contact Us
Refresh Your Home With Professional Painting
If you are thinking about repainting your interior, freshening up exterior siding, updating tired kitchen cabinets, or giving your business a cleaner look, our team is here to help you plan it right and paint it to last. Reach out to SGB Custom Painting to talk through your project, get honest expert guidance, and take the next step toward a home or workspace you will be proud of every day.
Follow Us
Elevate Your Space with SGB Custom Painting