SGB Custom Painting Blog
Why Your Paint Looks Patchy And How Pros Get Smooth Walls Every Time
Peterson SEO • December 3, 2025 | Chico, CA | USA
The Frustration of Seeing Stripes
You know that sinking feeling when you step back from a freshly painted room and think it looks pretty good... until the light shifts. Suddenly you see every streak, lap mark, and roller line running up and down the wall. It is incredibly frustrating, especially when you spent your whole weekend taping, covering furniture, and rolling, yet your walls still do not look like they were done by a pro. You are not alone in this struggle, as most homeowners in our area have the same complaint when they tackle painting on their own. The good news is that the gap between a "DIY finish" and a "pro finish" is less about secret paint brands and more about the specific process you follow. Once you understand what is causing those uneven spots, you can start painting in a way that sets you up for smooth, even walls every time.
In this article, we will walk through why walls look blotchy after painting, how professional crews avoid those problems, and what you can do differently next time. We will go step by step, from the boring but essential prep work to the final roller pass, and we will keep it practical so you can actually try these tips on your next room. Along the way, we will also touch on how sheen, primer choice, and tools all play together to either hide or highlight flaws in your drywall. If you are thinking about hiring a Chico painting contractor instead of doing it yourself, this guide will also help you recognize when someone is doing things the right way.
Quick Answer: How Do I Stop Roller Marks?
To get a smooth finish without roller marks, you must maintain a "wet edge" by always rolling back into paint that hasn't dried yet. Use a high-quality 3/8-inch nap roller cover, load it fully with paint rather than squeezing it dry, and apply the paint in consistent vertical sections. Finally, ensure your walls are clean, sanded, and evenly primed so the paint absorbs at the same rate across the entire surface.
Professional painters succeed because they do not rush the drying process. They control the environment to prevent the paint from "skinning over" too fast, which causes streaks. If you are struggling with patchy walls, it is often because the surface was not prepped evenly or the roller was too dry. A skilled painter Chico residents trust will always prioritize surface preparation and consistent application over speed.
Why Walls Look Streaky After You Paint Them
When your walls look streaky or patchy, it usually comes down to a mix of four specific things that went wrong. The surface was likely not prepped or primed evenly, meaning some spots soaked up more paint than others. The roller cover might have been the wrong thickness for the wall texture, or perhaps you did not use enough paint to keep a wet edge. Finally, the lighting in the room might be highlighting every tiny difference in coverage, especially if you chose a higher gloss finish.
According to the experts at Benjamin Moore, painting in manageable sections and rolling back into the still-wet paint is one of the most important ways to prevent lap marks. They also stress that starting with a properly primed surface and applying enough product helps the paint "level" into a smooth film instead of drying in ridges. In plain language, that means your walls need a consistent starting point and a consistent coat of liquid. If one patch of drywall is bare, another has old gloss paint, and a third was repaired yesterday, they will all soak in paint differently.
This results in "flashing," where some spots look dull and others look shiny depending on where you stand. Paint makers like Behr also point out that poor flow often comes from using the wrong tools or rushing in hot dry conditions, so the paint dries before it settles. In a place like Northern California, where interior rooms can get warm and dry in the afternoon, that happens a lot. Once you know these causes, you can start to fix them instead of blaming yourself or the paint quality.
How Pro Painters Get That Smooth Finish
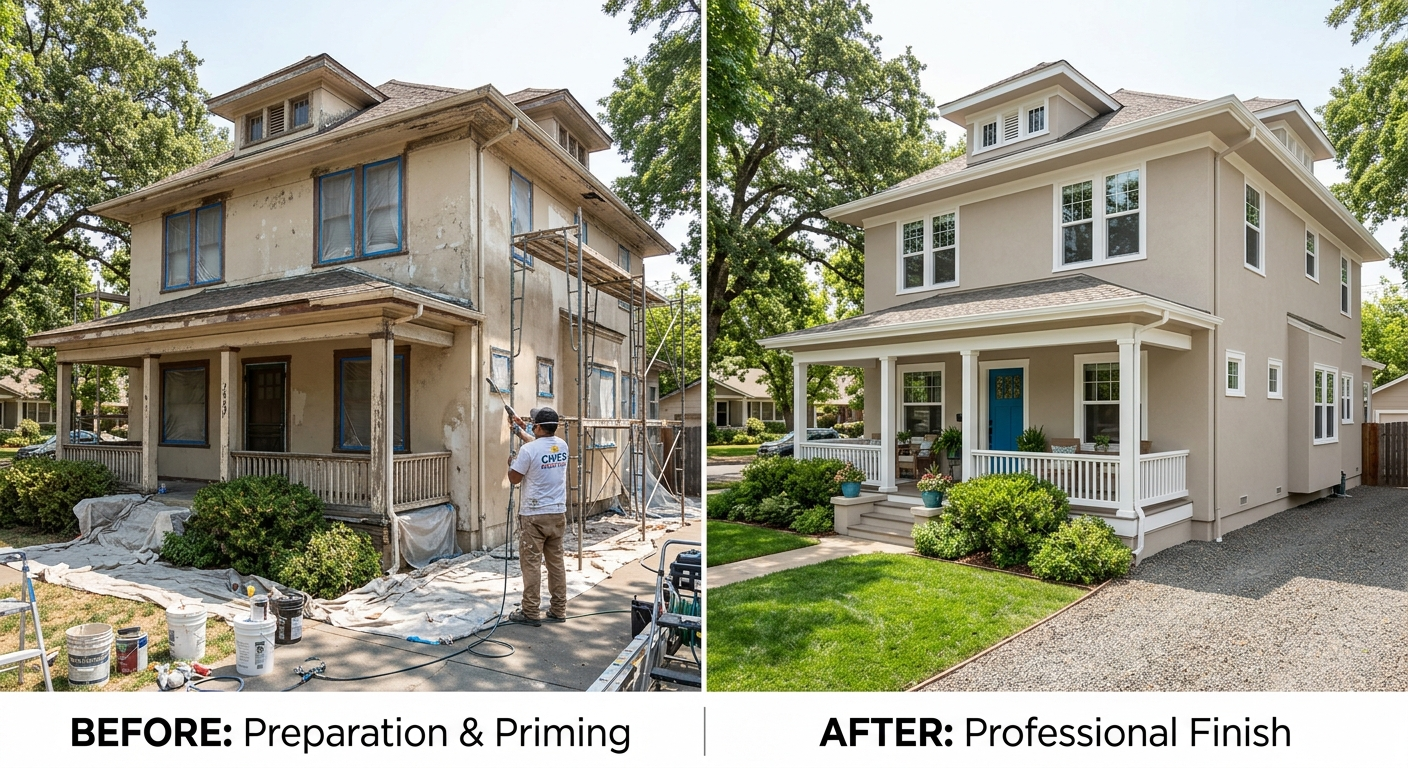
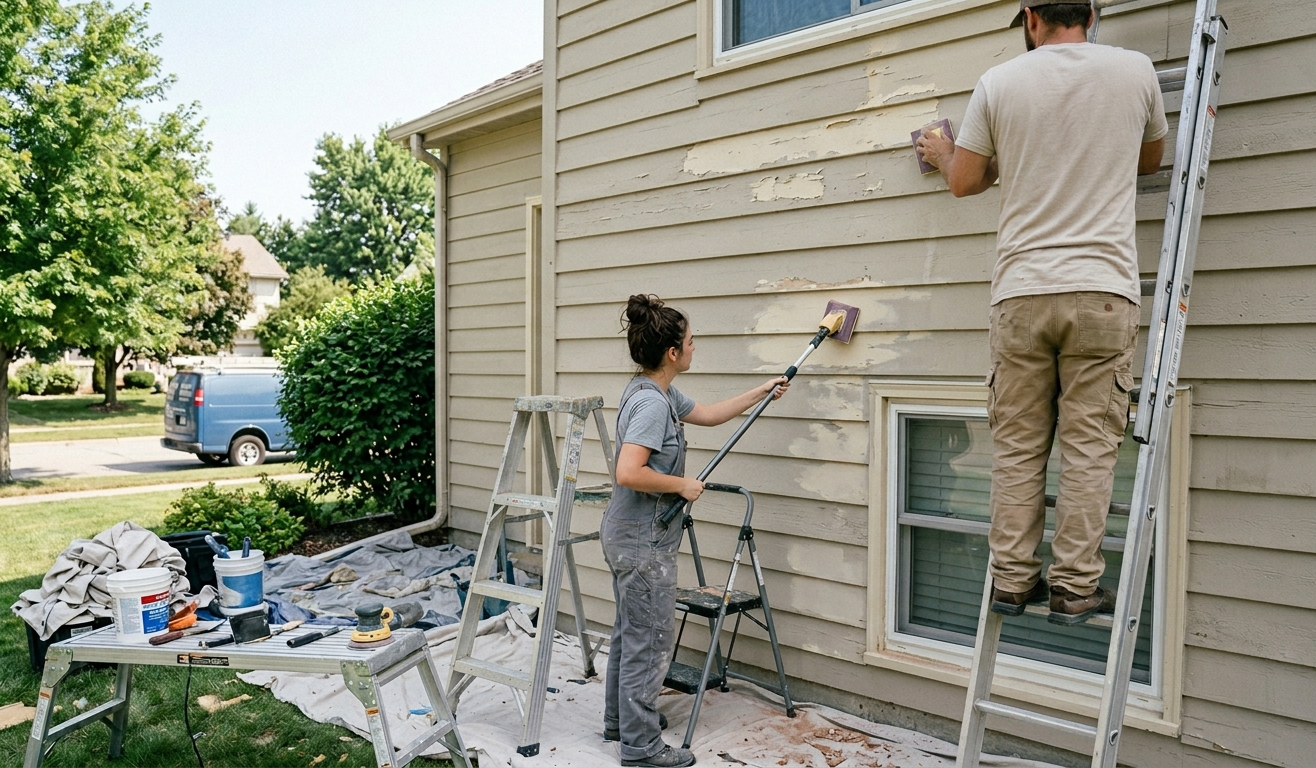
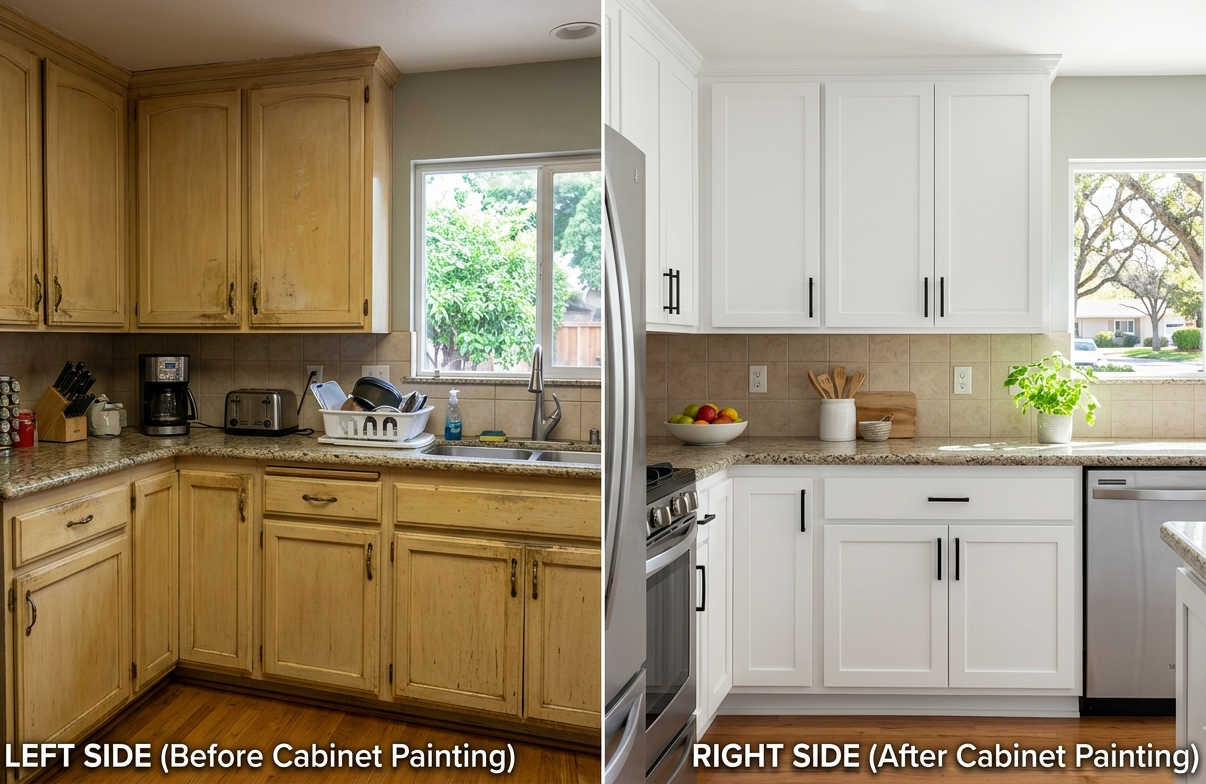
Professional crews are not magically better at rolling paint than you are... they just follow the same proven system every single time. First, they make the wall as uniform as possible before any color goes on the surface. That means patching nail holes, sanding repairs smooth, and knocking down old roller ridges or heavy texture that will show through the new coat. On many jobs, they will spot prime repairs, then prime full walls so everything has the same porosity and dries at the same speed. When a Chico painting contractor walks a room, they are already thinking about how the light from each window will hit every wall and what flaws will show.
The second part of the system is strictly about product and technique. Pros use the right nap roller for the surface, usually around three-eighths inch for typical interior walls, or sometimes a bit shorter for very smooth walls. They load the roller fully, work in small sections, and always roll from wet paint back into wet paint so there are no dry edges. They also expect to do at least two coats, sometimes more over dark colors. Even with top quality products, one heavy coat will almost always be more blotchy than two moderate coats. When you stack all these habits together, you see why a professional finish looks calm and even in every kind of light.
Step By Step: How To Roll Like A Pro
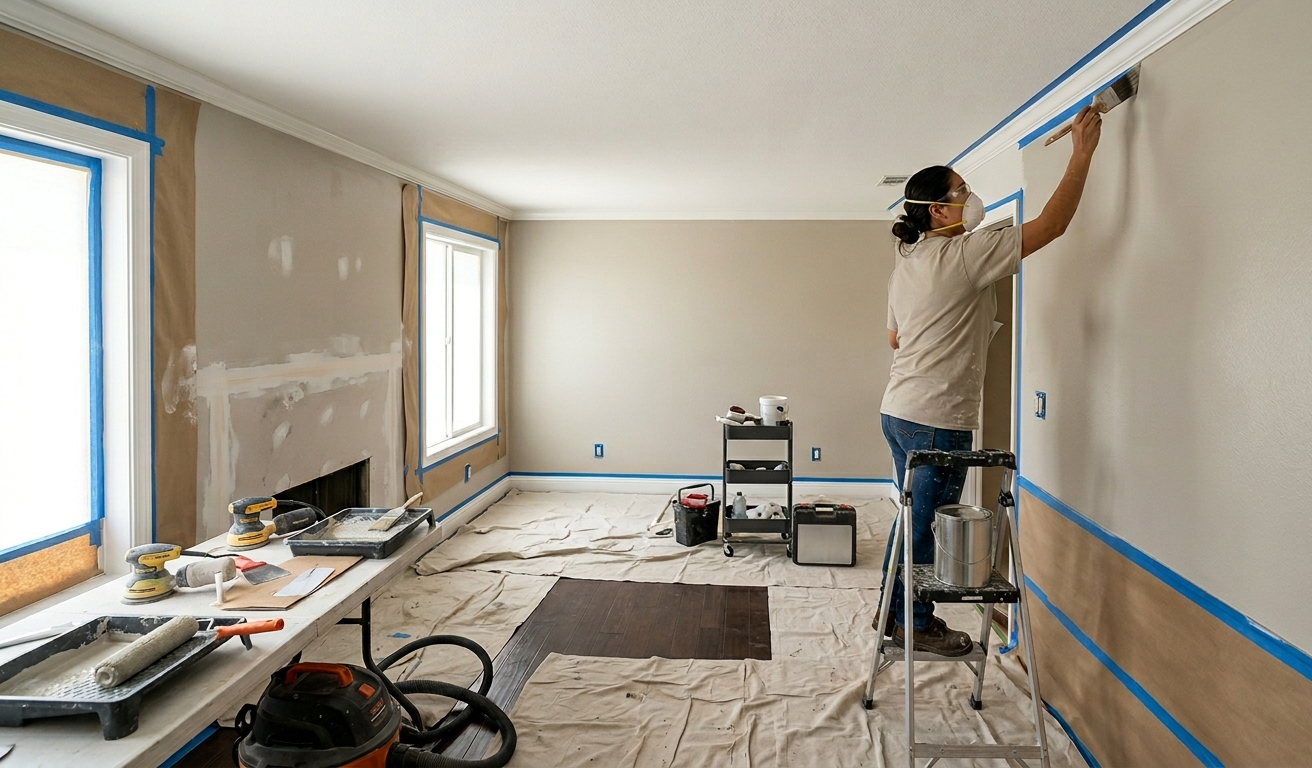
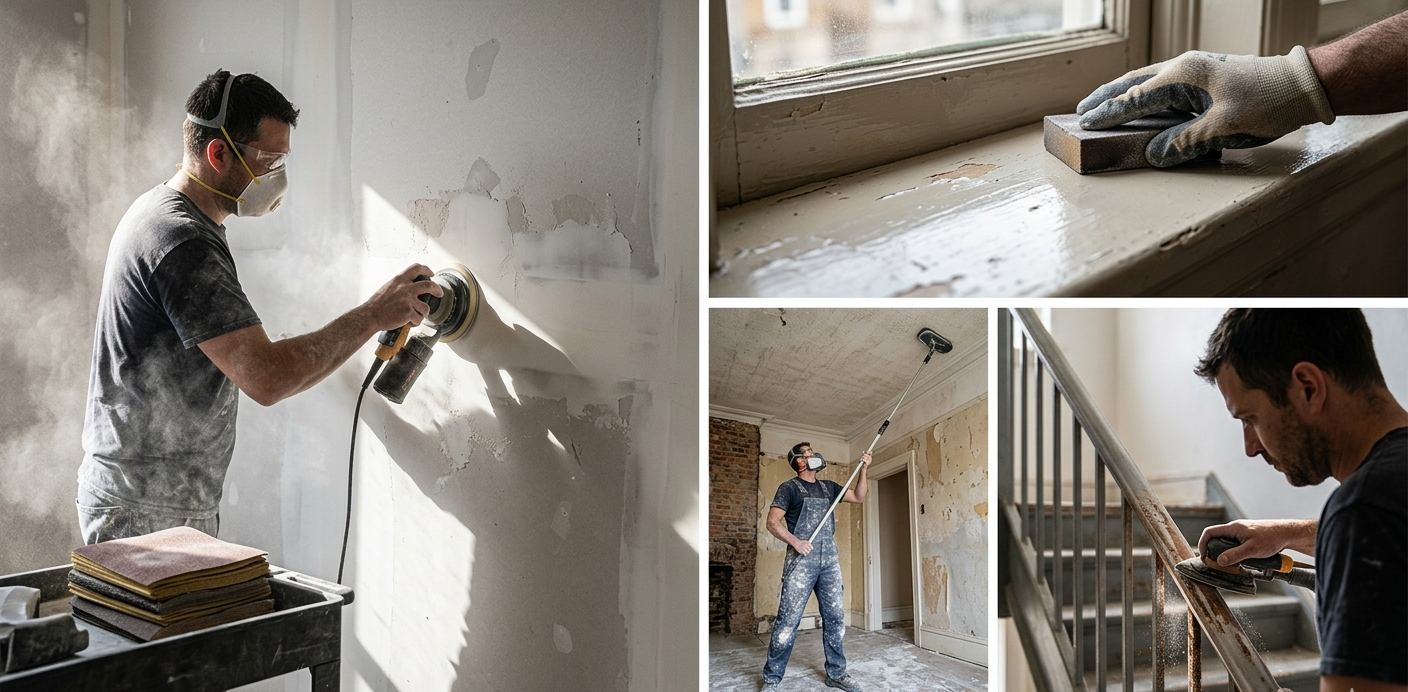
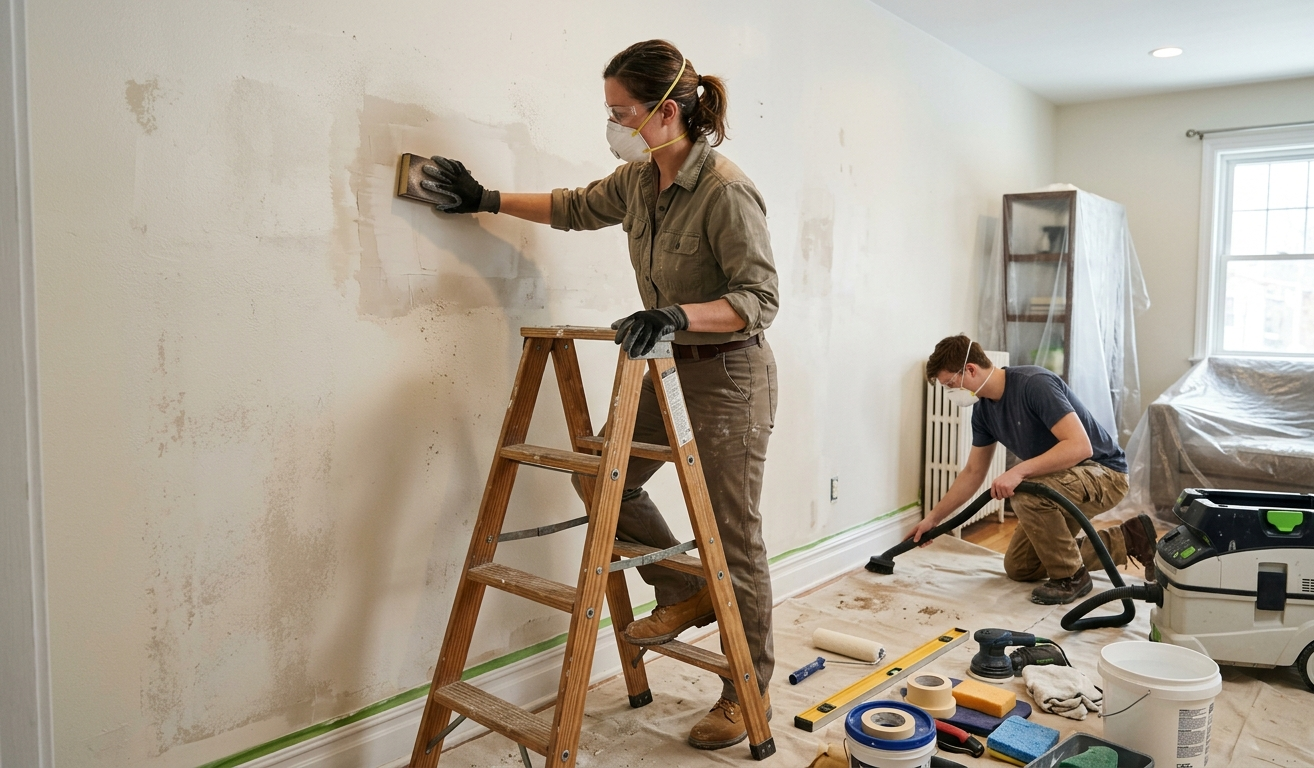
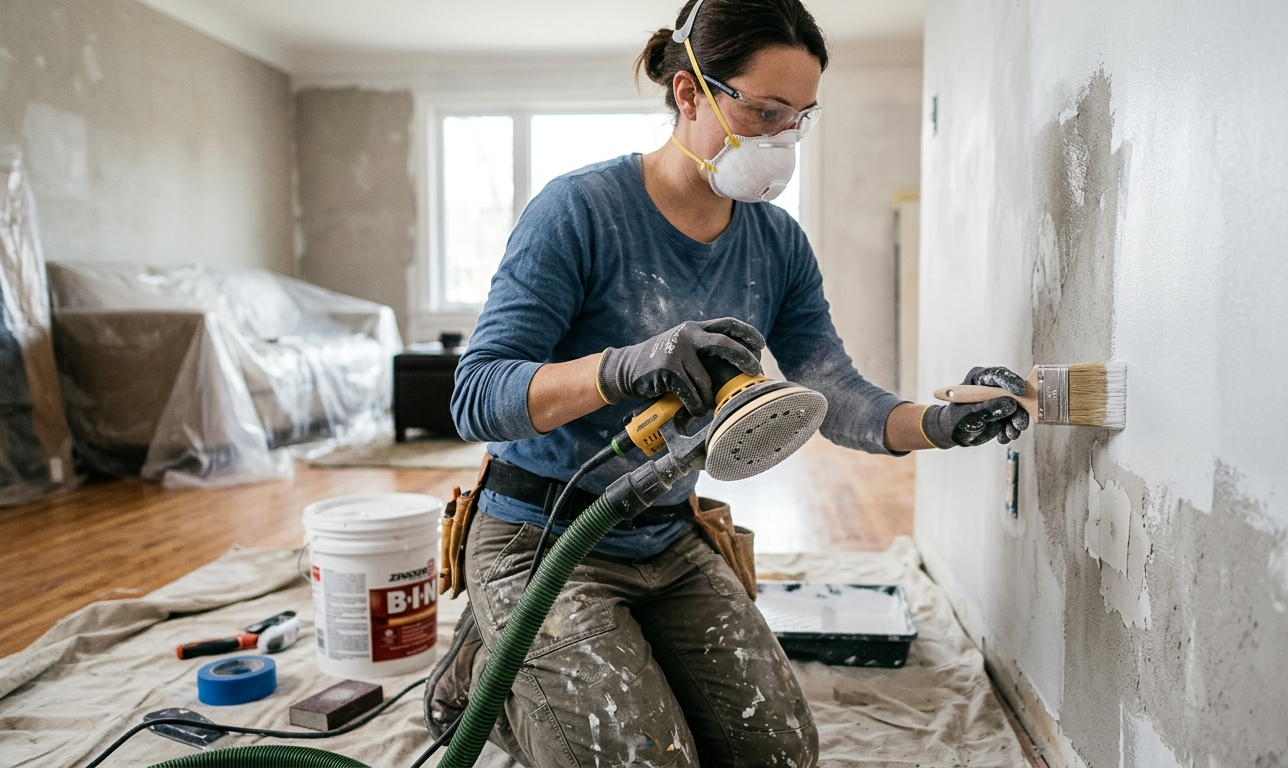
When you want smoother walls, the prep feels boring, but it is where most of the magic happens. Start by moving furniture away from the walls and giving the walls a quick wash where needed to remove grease or dust. Next, fill holes and small dings with a light patch compound and let it dry fully before touching it again. Sand those spots until you can run your hand over them and not feel a ridge. Then lightly sand any shiny areas so the new paint can grip the surface properly. Wipe the walls with a clean, damp cloth to remove sanding dust so it doesn't get stuck in your paint.
Once the surface is ready, tape off trim and edges if needed and cut in along the ceiling and corners with a good quality angled brush. Do not try to paint the whole wall with the brush or let the border dry completely. Instead, make a neat border two or three inches wide and try to roll into it while it is fresh. Load the roller fully, roll off excess in the tray, and then start in the middle of the wall section. Roll up and down in a gentle "W" or "N" pattern, then even it out with straight up-and-down strokes. Work in sections you can finish before they start to dry, usually a strip three to four feet wide.
Keeping A Wet Edge And Avoiding Lap Marks
A "wet edge" means the new paint you are laying down is always touching paint that is still wet on the wall. That way, everything blends into one smooth film instead of stacking up in stripes or layers. Paint experts recommend overlapping each new roller pass with the last one by a few inches and working from the unpainted area back into the still-wet painted area. The key is to resist the urge to jump around the room randomly. Start in one corner, finish that wall completely, then move to the next. When you stop in the middle of a wall and come back later, you almost always see a line where the paint dried.
Your roller pressure also matters more than you might think. If you press hard to squeeze out the last bit of paint, you will leave thicker ridges at the edges of the roller and thin spots in the center. That is how you end up with visible bands when the light hits the wall at an angle. Instead, reload the roller more often and let the paint do the work for you. Most pros would rather do two smooth coats with easy pressure than one heavy coat that looks rough. If you do notice a line forming while the paint is still wet, you can gently roll over it in long light passes to blend it in.
Primers, Tools, And Finishes That Help Hide Flaws
The right primer can make the difference between a patchy wall and a smooth one. Bare drywall and fresh joint compound soak in paint faster than previously painted surfaces. A high quality primer evens out that difference so your color coat dries consistently from corner to corner. If you skip primer on a wall with lots of repairs, you will almost always see dull spots, shiny spots, and areas that look a different color in certain light. This is one reason a careful Chico painting contractor often includes at least spot priming over patches before any color goes on.
Tools matter just as much as the liquid in the can. For most interior walls, a three-eighths inch nap roller works well on lightly textured or smooth surfaces. Shorter nap gives a smoother look on super flat walls, while longer nap is better for heavy texture. Cheap roller covers shed lint and do not hold paint evenly, which leaves specks and streaks. A mid-priced pro grade cover will last through several rooms and help the paint level out.
The finish level you choose also plays a big role in what you see. As we covered in our guide on choosing the right sheen for each room, flatter finishes hide more flaws but are less washable. Higher sheens show more imperfections but clean more easily. If you are not sure what gloss level to use to hide your wall texture, reviewing those sheen basics can help you make a choice that is more forgiving of roller marks.
Common DIY Mistakes That Lead To Rough Walls
One of the biggest mistakes homeowners make is trying to stretch a gallon of paint too far. When you roll and roll until almost no paint is left on the roller, you get thin areas and thick edge lines. Paint experts often note that trying to cover too much wall between roller reloads is a main cause of visible roller marks and uneven coverage. Another mistake is skipping sanding between coats when the first coat left some ridges or debris. A quick pass with a fine sanding sponge can knock down those high spots and help the next coat level out perfectly.
Another very common problem is working in hot, dry conditions without adjusting your plan. On a warm afternoon in Chico, paint on the wall can start to set up while you are still rolling. When you go back over it, the roller pulls and drags, leaving texture, roller tracks, and shiny spots. In our local climate, it often works better to paint earlier in the day, keep the room at a steady temperature, and close windows if dry wind is rushing through. Finally, many people skip the second coat because the wall looks "good enough" while it is wet. As it dries, thin spots appear and everything starts to look uneven in different light.
When It Makes Sense To Call In A Pro
There is nothing wrong with painting your own bedroom or hallway. Many homeowners enjoy the process and feel proud when it is done. Still, some projects are simply better handled by residential painting Chico professionals locals recommend. If your walls have heavy texture, old glossy paint, water damage, or lots of previous color changes, getting a smooth finish takes more than a weekend and a couple of rollers. It may require skim coating, full priming, and tight control over light, temperature, and timing. A seasoned crew can move through that work quickly, and they already own the tools and dust control systems.
You might also want help if you are getting ready to sell, or if you just invested in new flooring or cabinets and do not want to risk spatters. A trusted Chico painting contractor can walk your home with you, point out where extra prep will make a big difference, and explain which walls will need more attention. This is also the perfect time to review the important questions to ask a contractor to ensure they plan to prep and prime correctly. In many cases, homeowners choose to let a pro handle main living areas and high visibility spaces while they tackle smaller rooms on their own.
How SGB Custom Painting Can Help
If you are in Chico, Butte County, or nearby Northern California communities and you are tired of fighting streaky walls, you do not have to figure it out alone. At SGB Custom Painting, our crews focus every day on interior repaint work that needs to look good from every angle and in every kind of light. We follow a clear process, from careful prep and priming to the final light roller passes that leave your walls smooth and consistent. We are happy to explain each step so you understand exactly what you are getting for your investment.
Whether you want a full interior repaint or you just need help fixing a room that did not turn out the way you hoped, you can reach out to our team for friendly advice and a clear written estimate. We can also help you choose the right finishes and colors so your walls not only look smooth but also hold up to everyday life in your home. If you are ready for interiors that feel calm, even, and professionally finished, SGB Custom Painting is here to make that project much easier.
About SGB Custom Painting
SGB Custom Painting is a trusted Chico Painting Contractor known for clean prep, clear communication, and color that holds. For more than twenty five years, our local team has delivered interior, exterior, and cabinet projects for homes and businesses with careful protection, proper priming, and tidy jobsites. We follow EPA lead safe practices on older properties, keep schedules dependable, and give every project the respectful touch the North Valley deserves.
Love Your Space Again, Starting Today!
Locally Owned & Operated • EPA Lead Safe Certified • CSLB Licensed
Call 530-924-4109 or complete the form and expect a friendly call to confirm scope, discuss color options if needed, and deliver a no surprise estimate you can approve with confidence.
Contact Us
Refresh Your Home With Professional Painting
If you are thinking about repainting your interior, freshening up exterior siding, updating tired kitchen cabinets, or giving your business a cleaner look, our team is here to help you plan it right and paint it to last. Reach out to SGB Custom Painting to talk through your project, get honest expert guidance, and take the next step toward a home or workspace you will be proud of every day.
Follow Us
Elevate Your Space with SGB Custom Painting